Tuesday 15 October 2013

All Change

Sourced from HERE

So things have been very quiet recently for Springy Beard on the world wide web. But in reality things have been a little bit crazy and I have been having to make some very difficult decisions. After much soul searching I decided to close the Springy Beard shop.

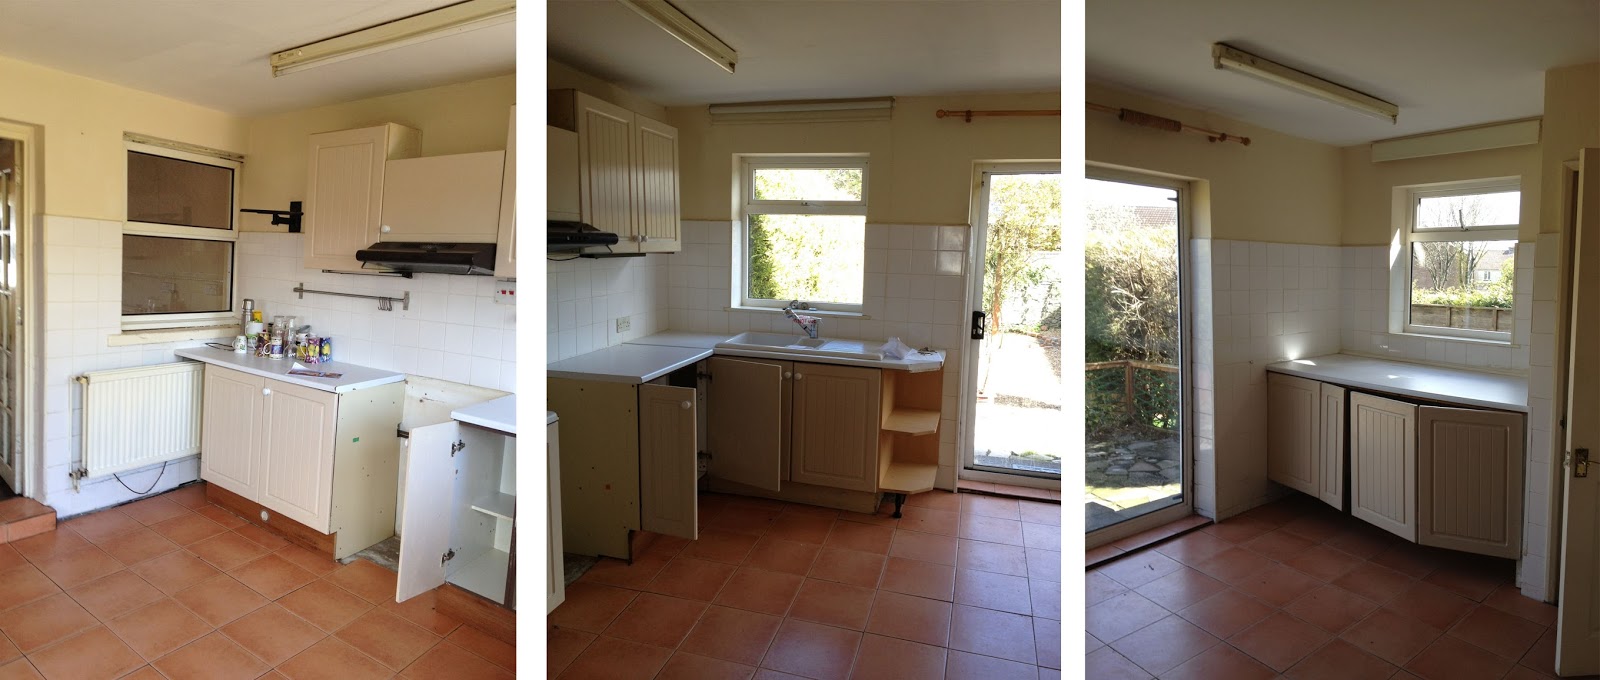
After a year and a half of doing markets I started to look into how to push the business forward. I realised without an injection of lots of cash and time, I just can't move forward. It has also come down to personal time. The day job has gotten super busy and our home still needs lots (and lots and lots...) of renovation. I really want to devote my weekends to improving my home rather than doing markets.

I now realise that I want to be my own boss but I don't want to do it alone. I want a business partner who will share the load and help inspire me. To me, this person has to be my other half Carl. Over the last month or so I have slowly been selling off my stock, and with the newly acquired space me and the other half can now share an office. We are currently brainstorming plans and ideas for a future business together. So Springy Beard will not be gone forever, it will just evolve into something new and exciting.

I hope to continue with occasional posts about what we are up to so please check in on us. I don't know if it is the change in the weather, I do love Autumn, but I sense these next few months are going to be great!
xx

Friday 12 July 2013

Allotment: Plant Markers

Things are coming along nicely at the allotment. We have one bed completed with fruits growing, the foundations for the shed complete and plans for the other beds ready and waiting. One thing I did realise I would need is plant markers - especially when someone plants a redcurrent and black current next to each other and then can't remember which is which! I decided to hunt the internet for some inspiration...

1 . 2 . 3 . 4 . 5 . 6

I am torn between the bricks and the bottle, at the moment leaning more towards the bottles, mainly because I think it would be nice to have a drink in celebration to every plant!
xx

Wednesday 10 July 2013

Tutorial: Elderflower Cordial

One of my interests is foraging, but in the past I have had very little opportunity to exercise this pursuit, but with the allotment being surrounded by beautiful countryside I have been keeping my eye out for any edible goodies in the wild. We have noticed some sloes and some blackberry bushes but the first on my foraging list which is ripe for harvesting at the moment is Elderflower!


There is a lovely looking elderflower tree near the allotment which I couldn't resist picking. I took a bunch home and decided to make some elder flower cordial. I took the recipe from one of my favourite books, called Through the Kitchen Window by Susan Hill. If you don't own it but dream of a country kitchen then this book is for you. It has inspired me for many years.


YOU WILL NEED:
  • A large bowl
  • A tea towel
  • A colander
  • A large spoon
  • A sieve
  • Large bottle for storing

INGREDIENTS:
  • 25 heads of elder flowers
  • 2lb sugar
  • 2oz citric acid
  • 2 lemons, zest and juice
  • 2 pints cold water

METHOD:
1. Remove large stalks and leaves from the elderflower and place in the colander
2. Give the flowers a wash under running water to remove any bugs or dirt
3. Place the flowers in a large bowl and cover with the sugar, citric acid, lemon zest and lemon juice
4. Cover the ingredients with the water and give a stir. Leave covered with a tea towel for 2 days stirring occasionally
5. After 2 days sieve the ingredients thoroughly to ensure no flowers remain and decant into a bottle 


Use the cordial by diluting it with water or lemonade to taste and keep in the fridge once open. Why not try adding some cordial to your cocktails this summer for a lovely refreshing kick or make in a larger batch, decant into smaller bottles and save for Christmas presents (yes I just said Christmas)! One of my favourite things when I am feeling a bit under the weather is to make elderflower cordial with hot water, you can even add a slice of lemon and a spoon full of honey to make it truly medicinal.
xx

Monday 8 July 2013

Bathroom Wishlist

I have started collecting together my Wish-List for the bathroom makeover! It is very exciting as it gives you a sneaky glimpse at what the end results may be! xx

1 . 2 . 3 . 4 . 5 . 6 . 7 . 8

Thursday 4 July 2013

Sanding for the Big Boys

I thought I would give you some of the background story to us prepping the house before moving in, we wanted to try and get as much messy work done as possible. This involved stripping out as much of our wood cladding as we could, steaming off the lovely textured wall paper that covered every wall and sanding down the floors....


To do the floors we rented an industrial sander. Luckily we have a tool hire place just down the road and to rent the sander for the weekend ended up being about £90. It was so heavy though! But thankfully I have my amazingly spacious Berlingo, so transporting was not a problem - getting it up the stairs was a 3 man job!


It saved us so much time and actually gives very good results. It is not as difficult to manoeuvre as you would have thought, once you switch it on it doesn't feel as heavy to push backwards and forwards as it is then positioned on its wheels. My main tip though? Make sure you have hammered down all the nails in the floor properly before you start sanding, seeing sparks fly out from under your industrial sander is not a good sign!
xx


Tuesday 2 July 2013

Summer Drinks

My aim this year has been to enjoy every bit of sunshine that I can. If you are in agreement then I highly recommend investing in some items to make your summer drinks a real statement! xx

1 . 2 . 3 . 4 . 5 . 6

Monday 1 July 2013

Bathroom Inspiration

Do you use pinterest??? I think I am addicted! Basically, you search the internet and when you come across an image that you like you 'Pin It'. The image gets saved to a board, basically like a digital scrap book - and being the girl who has been cutting images out of magazines since she was single figures and saving them in a folder - this is my idea of heaven.

When planning the look of rooms in the new house, I could not help but create a pin board for each room. With the Bathroom being the first to tackle, I thought I would share with you images that are inspiring me.


Please head over to my pinterest board HERE where you can click on the images and find their original sources. I will be adding more and more images to my boards so please come back and visit.
xx

Friday 28 June 2013

Rotavating


The above photos are a bit misleading. Today I decided to rent a rotavator and make a real stab at the ground on the allotment. My folks came down for the day to lend a hand and we were so happy and positive with the sun shining and a picnic ready for our lunch time break. What we didn't anticipate was how hard the ground was! We presumed that the turf would be able to be worked into the ground, slowly rotting and adding nutrients to the soil, but the turf was so tough that we soon realised we would be better off doing it by hand. So after a combination of petrol rotavator and spade and fork power the plot looked like this...


The plus side was, when we arrived at the allotment we had a very special surprise waiting for us. A juicy delicious ripe strawberry!


I hope you all have a lovely weekend. My plans are a nice lunch in Lacock on Saturday and more bathroom preparation on Sunday.
xx

Tuesday 25 June 2013

Allotment Update!

I got told off! With all the moving and working and markets, etc. etc. the allotment got abandoned! And what happens when you ignore your plot? The grass grows and you get a letter from the Allotment Association telling you to cut your grass or you will be kicked out!

So I begin cutting the grass with a push along lawn mower (no electric at the allotment and a petrol mower was too heavy for me to carry down) and I give myself lots of blisters and tears, until a neighbour rescues me and cuts it with their petrol mower! And after some additional toiling the plot looks like this...


...our progress is probably considered slow.

But we finally have a water butt and a completed base for a shed. The soft fruits are coming along and my potato bags are looking healthy. I have covered over some areas of grass ready for beds and added some nice reclaimed wood around the completed one. Next addition will be a compost bin!
xx

Monday 24 June 2013

The First Project: The Bathroom


So, we have decided to tackle the bathroom first. It was really the only room that we didn't do anything to before we moved in. But now that we are here I feel we need to have somewhere we can escape to after a hard day DIYing. The above image is a reminder of what we were dealing with when we first moved in, but after a weekend of hard work (not to mention removing an electric shower and water pipes!) the bathroom now looks like this...


We have removed all the wall tiles, the airing cupboard and the ceiling. Basically we are at the bare bones stage. Now that we have an opportunity to assess the condition of the walls, we are thinking that we need to replace/insulate some of them with plaster board and carry out some heavy duty fills before we can take the next step. But my hope is by the end of August the bathroom will be complete!
xx

Thursday 20 June 2013

House Tour: At First Sight

So we got the keys and this is the sight that meets us as we opened the door for the first time...

The Porch

The Front Room
The Kitchen

The Garden

The Stairs
The Bathroom
The Bedroom
The Studio


It obviously needs a lot of cosmetic work but it was also lacking hot water and a central heating system. So hot water we now have, central heating we now have in most rooms and slowly we have stripped back to reveal the bare bones of this house. I'll try and give you more detail room by room as things develop - this weekend we are removing the bathroom tiles!
xx

Monday 10 June 2013

The Hardest Month

Hello! I must apologies for having been so long, but this last month has been the hardest month I have ever experienced.

Never mind trying to maintain my 2 part-time jobs, whilst doing markets, (a wedding and 3 birthdays thrown in for good measure) and completely overhauling the new house -  in between everything we had some devastating news that shook my family to the core and a second scare which involved hospital visits to intensive care.

I have cried a lot this month and been reflecting a great deal.


But with every last breath there is new life and my strawberries on the allotment, producing beautiful flowers and tasty treats to come, bring a smile to my face. We are still not fully back up and running but the blog will hopefully be returning to normal, and the shop will soon follow suit (once I have unpacked everything!).

Also, stay tuned for the house tour which will be coming soon!
xx

Monday 6 May 2013

We Bought A House!!!


So I have dropped a couple of hints over the last few weeks that something exciting has been in progress and you guessed it - we bought a house!

So let me fill you in on the whole story. After our wedding in January we counted up our pennies and started house hunting. We fell in love with a period terraced property in the centre of town which was at the top of our budget but needed everything done to it - central heating, bathroom, kitchen, (potentially some new joists in one of the bedrooms!) but it was gorgeous. We eventually put an offer in at what we felt we could afford, but we got out bid and had to walk away. For a month afterwards we felt very dejected and no properties in our price range were coming on the market - it was not a happy time.

Then, one evening we read a description of a property on the Internet, no pictures were available, but it sounded interesting and we booked an appointment for the next day. It ticked every box we could have hoped for! Not only did it have the space we needed - 2 double beds, bathroom upstairs, off road parking, garden, shed - it also ticked some of our dream wish list - right location, needs work so we can add value, has a big kitchen, a traditional front door and parquet flooring! The only catch was that the sale had to go through quickly so we set to work trying to make it happen but knowing that if we didn't meet their deadlines we might loose the house. But we made it!

I have to say I am completely overwhelmed by the whole thing. There is a lot of work to do on the place before we can even move in, and until we do I don't think it will feel real. It kind of feels like we are moving to another rented place - it all very strange.

Due to now having 2 jobs, an alottment, markets every weekend and 2 houses to sort out, blog posts will be a bit slim over the next month. Things will get back to normal soon.
xx

Friday 26 April 2013

New Item Friday

Head over to the shop HERE

We are currently house/cat sitting for my parents. I write this whilst sat at the kitchen table, sun shining through the open door, and with a cat on my lap who keeps pestering me for attention. It is actually very difficult to type when you are having to stretch and manoeuvre around a big tabby cat! I sense this may mean there are fewer posts next week (I have images of me being pinned to the bed at night by my parents 3 cats and not being allowed to leave! If you don't hear from me by the middle of May send a rescue party!).

However, as my Mum is lovely she left all manner of tasty treats for us in the house and I think the cake stand above is the perfect addition to the shop to honour her Welsh cakes and Flapjacks. No market this weekend thankfully, but work with the National Trust as usual. I am hoping to enjoy as much sunshine as possible!
Have a lovely weekend.
xx

Thursday 25 April 2013

57 years ago today...


Another Hobbies Weekly for you today. Highlights from this issue are...

  • Make a covered wagon electric light
  • Make your own negative album
  • Make a meat safe
  • Designs for toothbrush holders
  • How to make a kite

P.S. Please remember that this is a vintage magazine so some of the materials used may no longer be suitable or comply with current heath and safety regulations. Please be careful and check out all materials for modern equivalents. We can not be held liable for any injuries incurred, but please don't injure yourself!

Wednesday 24 April 2013

Before & After: Scooter


I entrusted the hubby with item shopping the other week. Due to being back in the National Trust open season, I don't get a free Sunday to go car booting anymore, instead I send the hubby with a wad of cash and ask him to shop wisely! And he didn't let me down, one of the items he returned with was this fantastic scooter. Yes, it was a bit rusty and dirty but it has a great shape and colour to it.

The right half of the chrome wheel has been treated with Autosol

I decided to try out a new product on the metal surface called Autosol. Autosol has been around for a while but this is the first time I have used it - we used to use something similar in conservation called Prelim. It is basically an abrasive paste that has certain chemical qualities to it, you wipe the paste on to the surface, I then used the rough side of a sponge to work it in, and then you wipe it off with a clean cloth. It worked a treat at removing the corrosion, and with a little extra cleaning and treatment of the metal the scooter has come up looking fab.


I would love to keep this fella but I sense I would be laughed at if seen scootering down the street - a fully grown women on a kids purple scooter! But I think it will draw some great attention at our next market, particularly when placed in my out-door camping display, with a garden lounger, bowls set, thermos, etc.

I would definitely recommend giving Autosol a try on any of your rusty metal but remember to wear protective gloves, use in a ventilated area and be careful not to work it too roughly into the surface as it may damage surfaces under the corrosion layer.
xx

Tuesday 23 April 2013

Allotment: Double Digging


We worked really hard on the allotment at the weekend in order to get a bed ready for all our soft fruits. Things like raspberries, blackberries, rhubarb, etc. all take a year or two to settle and produce decent fruit - so the sooner we get them in the sooner we will be enjoying plenty of vitamins! Because we are a bit late in the growing season we have also planted some potatoes in grow bags so that we will have something to harvest later in the year. The plot does look a bit messy at the moment but give me another year and it will look amazing - fencing, a shed, proper pathways, edging for the beds, etc. etc.

The only problem we have with our plot is that the soil is clay! Clay is great as it contains lots of nutrients but it locks in a lot of water and can be too dense/heavy for certain plants (plus it is really heavy and hard work!). Root vegetables like potatoes, parsnips, etc. that all have deep rooting systems require something a bit lighter.

However, there is a way to help make clay soil more suitable - Double Digging.

Image sourced from HERE

The diagram above illustrates how to 'double dig' but some basic instructions are:

  1. Section off the area of your bed
  2. Start at one end, remove a strip of the turf and place to one side.
  3. Remove a spades depth of the earth which you have just exposed and place the earth to one side
  4. Using a fork or soil turner loosen up the bottom layer of earth
  5. Then start on your second strip. Remove the turf and place upside down on the earth you have just forked over
  6. Fork over the upside down turf just to loosen it up a bit
  7. Then remove a spades depth of earth and place on top of the upside down turf
  8. Keep repeating the process until you have covered the entire area of your bed. You should have a gap at the end which you can place the turf and earth that you removed from the first strip
  9. You are done - have a cuppa!


This technique does take longer than just digging over the surface but the advantage is that you aerate the soil and once the turf under the soil has rotted it will add some nutrients. You can even add extra manure and things like grit and natural waste during the digging process to help with soils types such as Clay.

So, hard work but it will be worth it in the future when we have fantastic soil that we can grow anything in! Just another 3 beds to go....
xx

Friday 19 April 2013

New Item Friday


Head over to the shop HERE

I have been on the Babycham this week, hence why my items today have taken an unconscious cocktail theme! For any one not aware of what Babycham is, it is a sparking alcoholic beverage made from pears but is actually referred to as a sparkling perry. They actually make it down the road from us in Shepton Mallet and it comes in little tiny bottles with the most fantastic iconic Bambi logo which oozes retro appeal.

Image sourced from HERE

It hasn't been a particularly rough week but with small amounts of sun coming out I have been fancying a nice sparkling drink after a long day at work. I have been very busy though! We are attending a very exciting 20th Century Fair this Sunday at Ashton Gate Stadium in Bristol, and I have taken the (financial and spiritual) leap of booking a double pitch. This means I have room for even more goodies to show off, but then I realised it meant I had double the amount of items to sort out! Thankfully I am all sorted and packed, I can enjoy a nice Babycham this evening whilst wandering the Internet, meander down the allotment tomorrow and plant some soft fruits, so that I am fully charged for the chaos that will be Sunday!

If you happen to be in Bristol on Sunday please come down and visit us at Ashton Gate Stadium!
Have a lovely weekend
xx

Thursday 18 April 2013

57 years ago today...

Another Hobbies Weekly for you today. Highlights from this issue are:


  • How to make a novel rack for scissors
  • Canework basketry
  • How to make a brick pedestal sun dial
  • How to get a perfect finish with varnish
  • Idea for a party centre piece


P.S. Please remember that this is a vintage magazine so some of the materials used may no longer be suitable or comply with current heath and safety regulations. Please be careful and check out all materials for modern equivalents. We can not be held liable for any injuries incurred, but please don't injure yourself!

Wednesday 17 April 2013

Colour Inspiration: Pink

I decided the bedroom needed a little brightening up with spring being upon us, but as with most rented places, I can't paint the walls or hang too many pictures. Plus I don't want to spend any money, the allotment needs all my funds at the moment, so what to do?


I decided to change the bedding, I put a pink throw over the entire bed and used a nice stripey one as a footer. But I'm not convinced with the results. I'm not really a pink kind of person, and the jury is still out on my current bedroom arrangements, but it got me thinking about where pink can be a real asset in a room.

A soft pink can add a really nice 30s/40s feel to a room

Take a risk and go for neon pink statement pieces teamed with turquoise

How about a pink and orange floor - the bold paint colour
 and white accessories helps balance the room

Pink and orange can give a really exotic and luxurious feel - think
1930s glamour

Or what about a more subtle pink in the form of coral pink - although lets be honest,
there is nothing subtle about this room!

So my advice to you is to be brave with the pink, but for the cautious out there, maybe just a pink accessory or two can help brighten up that room.
xx